Sketch How To Draw A Hand
Hands can be notoriously difficult to draw correctly, especially when you're trying to create the illusion of depth and foreshortening. That's why we've put together this comprehensive guide to help you draw hands like a pro. With the help of reference sheets and guides, you'll be able to master the art of drawing hands in no time.

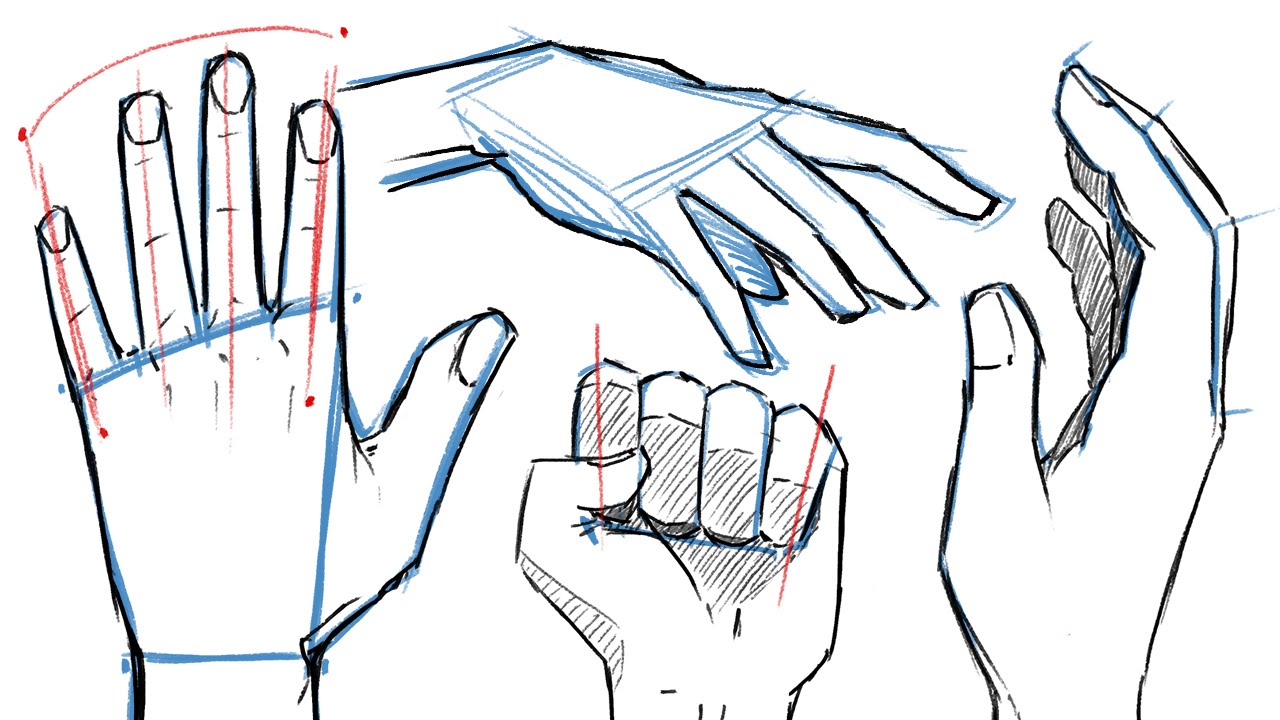
First things first, it's important to understand the basic anatomy of the hand. The hand is made up of three main parts: the palm, the fingers, and the thumb. The palm is the largest part of the hand and is made up of five bones called metacarpals. The fingers and thumb are attached to the palm by joints and are made up of smaller bones called phalanges.
When drawing hands, it's important to pay attention to the proportions. The length of the fingers should be roughly the same as the length of the palm, and the width of the thumb should be roughly the same as the width of the fingers. Remember, hands come in all shapes and sizes, so it's okay if your drawings don't look exactly like the reference sheets.
How to Draw Hands
Now that you have a basic understanding of hand anatomy and proportions, it's time to start drawing. Here's a step-by-step guide to help you:
- Start by drawing a basic outline of the hand. Pay close attention to the proportions and make sure the fingers are roughly the same length as the palm.
- Once you have the basic outline, start adding detail to the fingers. Don't worry about shading or texture just yet.
- Add the thumb. Remember to keep the width of the thumb roughly the same as the width of the fingers.
- Next, start adding shading to give the hand more depth. Pay attention to where the light source is coming from so you can create realistic shadows and highlights.
- Continue adding detail to the fingers and thumb. You can add texture to the skin by drawing small lines or dots.
- Finally, add any details like fingernails, wrinkles, or veins.
- Once you're happy with your drawing, erase any leftover guidelines and shading.
- Congratulations, you've successfully drawn a hand!
Remember, practice makes perfect. Don't be discouraged if your first few attempts at drawing hands don't turn out the way you want them to. Keep practicing and you'll get better in no time.
Tips for Drawing Hands
Here are a few tips to keep in mind when drawing hands:
- Use reference sheets and guides to help you understand hand anatomy and proportions.
- Pay attention to the proportions of the hand, including the length of the fingers and the width of the thumb.
- Start with a basic outline and add detail gradually.
- Pay attention to shading and light source to create realistic depth and dimension.
- Don't be afraid to make mistakes and keep practicing!
With these tips and tricks, you'll be well on your way to becoming an expert hand-drawer. So grab your pencils and get to work!
So there you have it, a comprehensive guide on how to draw hands. We hope this has been helpful and given you the confidence to tackle this tricky subject matter. Remember, practice makes perfect, so keep drawing and experimenting until you find a style that works for you.
If you have any other tips or tricks for drawing hands, feel free to share them in the comments below. We'd love to hear from you!

Post a Comment for "Sketch How To Draw A Hand"