Learn To Draw 3d Sketches
Okay, folks! We're back with some exciting news. Today, we're going to teach you how to draw a simple 3D cube. Now, we know what you're thinking - "oh great, another boring art tutorial". But wait! We promise to make it fun, easy and interesting. So grab your pencils and let's get started!
First things first, let us introduce you to the basics of 3D drawing. You see, when you're drawing in 3D, you're not just drawing on paper, but you're also creating the illusion of depth and space. So, before we begin drawing a cube, we need to know how to create the illusion of 3D.
One of the first things you need to keep in mind is perspective. Perspective is what gives drawings depth and makes them look three-dimensional. You can think of it as a visual trick that creates an illusion of space. To create the perspective, we use vanishing points, which are points on the horizon that guides our drawings. This might seem confusing, but don't worry, we'll explain it all in detail.
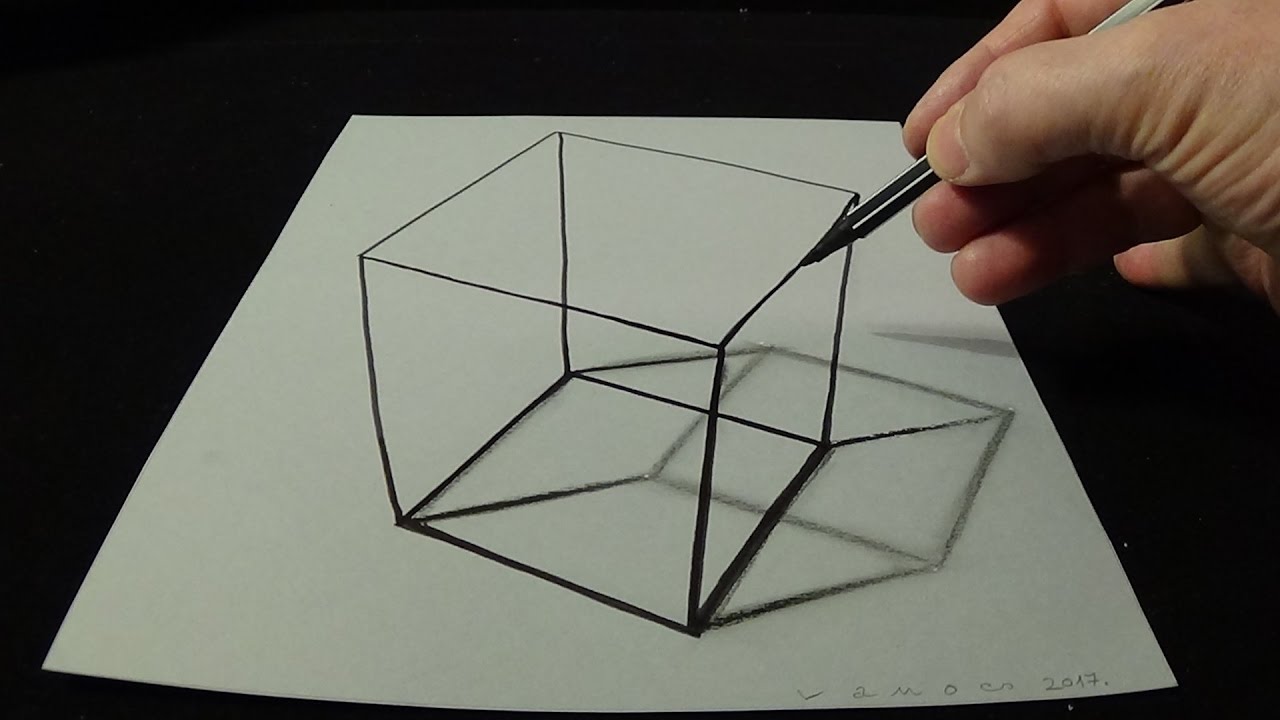
Now, let's move on to the actual cube. Drawing a cube may seem daunting, but it's actually quite easy once you've grasped the basics. First, draw a square. This will be the front of your cube. Then, draw two more squares on the right and left side of the initial square. These squares will be slightly smaller than the first one since they'll be tapering off into the distance.
Next, draw lines connecting all the corners of the squares. This will create the sides of your cube, giving it the 3D look. Remember to draw these lines lightly, as you'll be erasing them later. Now, using the vanishing point (remember that?), draw diagonal lines going from the corners of the squares towards the back of the cube. Again, these lines will taper off slightly as they get further away.
Now, connect the lines you just drew to create the back of the cube. Erase the unnecessary lines, and voila! You've just drawn a 3D cube. You can add shading and texture to give it more depth, but that's a whole different tutorial altogether.
If you're still not confident in your drawing skills, don't worry. Practise makes perfect. Keep practising drawing simple shapes like squares and rectangles until you feel more comfortable, then move on to more complex shapes. And remember, you don't have to be an artist to enjoy drawing.
So there you have it, folks, a simple tutorial on how to draw a 3D cube. We hope you found this tutorial helpful and informative. If you have any questions or comments, feel free to leave them down below. And if you managed to draw a cube successfully, share it with us. We'd love to see your creations!
How to Draw a 3D Cube Recap:
- Basic 3D drawing involves creating the illusion of depth and space
- Perspective and vanishing points help create the illusion of 3D
- To draw a cube, draw three squares and connect them with lines
- Use the vanishing point to draw diagonal lines to create the back of the cube
- Erase the unnecessary lines and add shading for more depth
- Practise makes perfect, so keep practising!
Tips for Better 3D Drawing:
- Start with simple shapes like boxes and cubes
- Use a ruler and a protractor for straight lines and angles
- Play around with perspective and vanishing points to create interesting compositions
- Experiment with shading and texture to add depth and realism to your drawings
- Don't be afraid to make mistakes - they're a natural part of the learning process
Now, you're all set to create your own 3D drawings. Go forth and draw, my friends!

Post a Comment for "Learn To Draw 3d Sketches"