How To Draw On Etch A Sketch
Do you remember playing with Etch A Sketch as a child? The iconic red frame with two knobs that allowed you to draw lines by moving them up, down, left and right. The drawings were temporary, and it was impossible to keep them, or was it? Some artists have been working on creating intricate images on Etch A Sketch that never erase, and they are incredibly stunning.
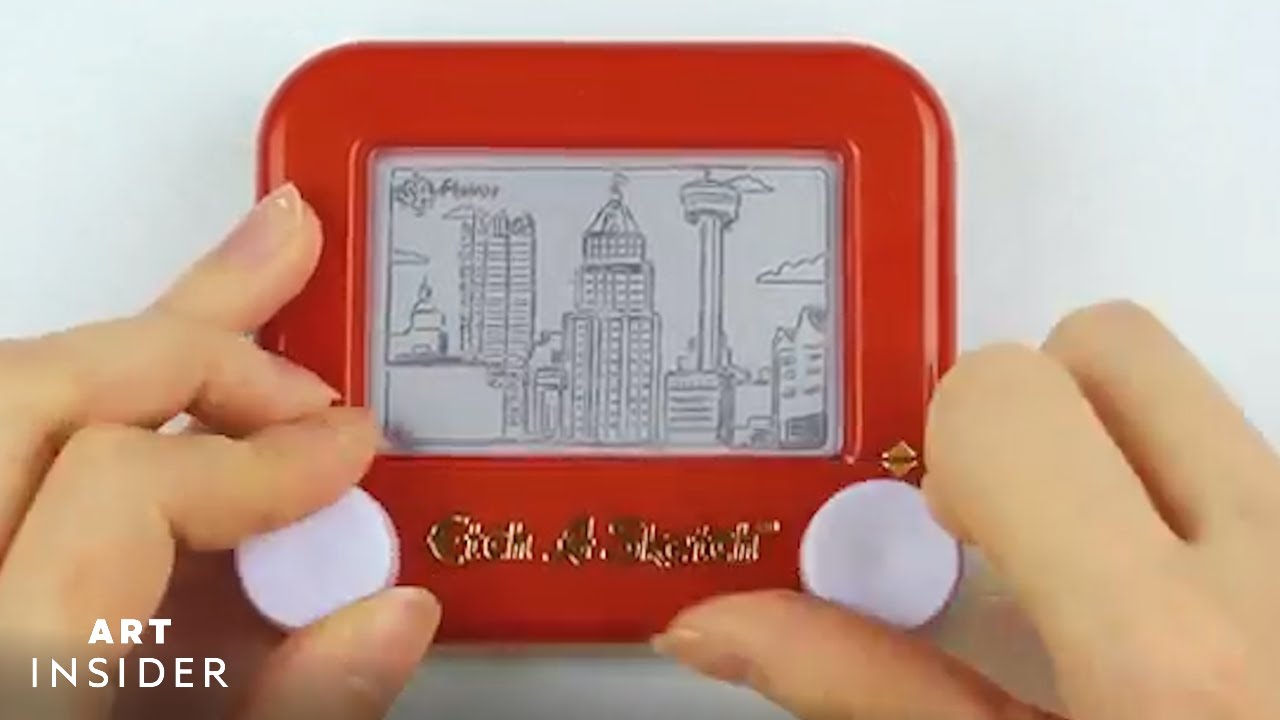
The process of creating these intricate images on an Etch A Sketch is nothing short of impressive. The artist starts by carefully shaking the Etch A Sketch to get rid of any excess aluminum powder. They then start drawing the image, making sure to use the knobs' exact movements to create straight lines and curves.
What's even more impressive is that these images are permanent. The artist makes sure that the aluminum powder is pressed firmly onto the glass so that the image will not disappear when the Etch A Sketch is shaken. The level of detail in these images is remarkable, and it's hard to believe that they were created using a toy we all played with as kids.
It's fascinating to see how artists can take something as simple as an Etch A Sketch and turn it into a work of art. It goes to show that creativity knows no bounds, and anything can be used as a medium for art.
If you're interested in creating your own permanent Etch A Sketch image, here are some tips to get you started:
How to Create an Etch A Sketch Image That Never Erases
1. Start with a clean slate – shake your Etch A Sketch to get rid of any excess aluminum powder before starting.
2. Plan your image – sketch out your design on paper before starting on the Etch A Sketch.
3. Use a stylus – a stylus can help you create more precise lines and curves than the knobs.
4. Take your time – creating a sophisticated piece on an Etch A Sketch takes time and patience.
5. Prevent smudging – avoid resting your hand or fingers on the Etch A Sketch while drawing to prevent accidentally smudging the lines.
6. Press firmly – press firmly on the glass as you draw to make sure the aluminum powder sticks to it.
7. Don't shake too hard – shaking too hard can cause the aluminum powder to shift, ruining your image.
8. Seal the image – once you're finished, seal the image by removing the back of the Etch A Sketch and using clear tape to cover the aluminum powder.
There you have it – creating an Etch A Sketch image that never erases is possible, and the results are stunning. What image will you create on your Etch A Sketch?

Post a Comment for "How To Draw On Etch A Sketch"