2d Sketch Drawing
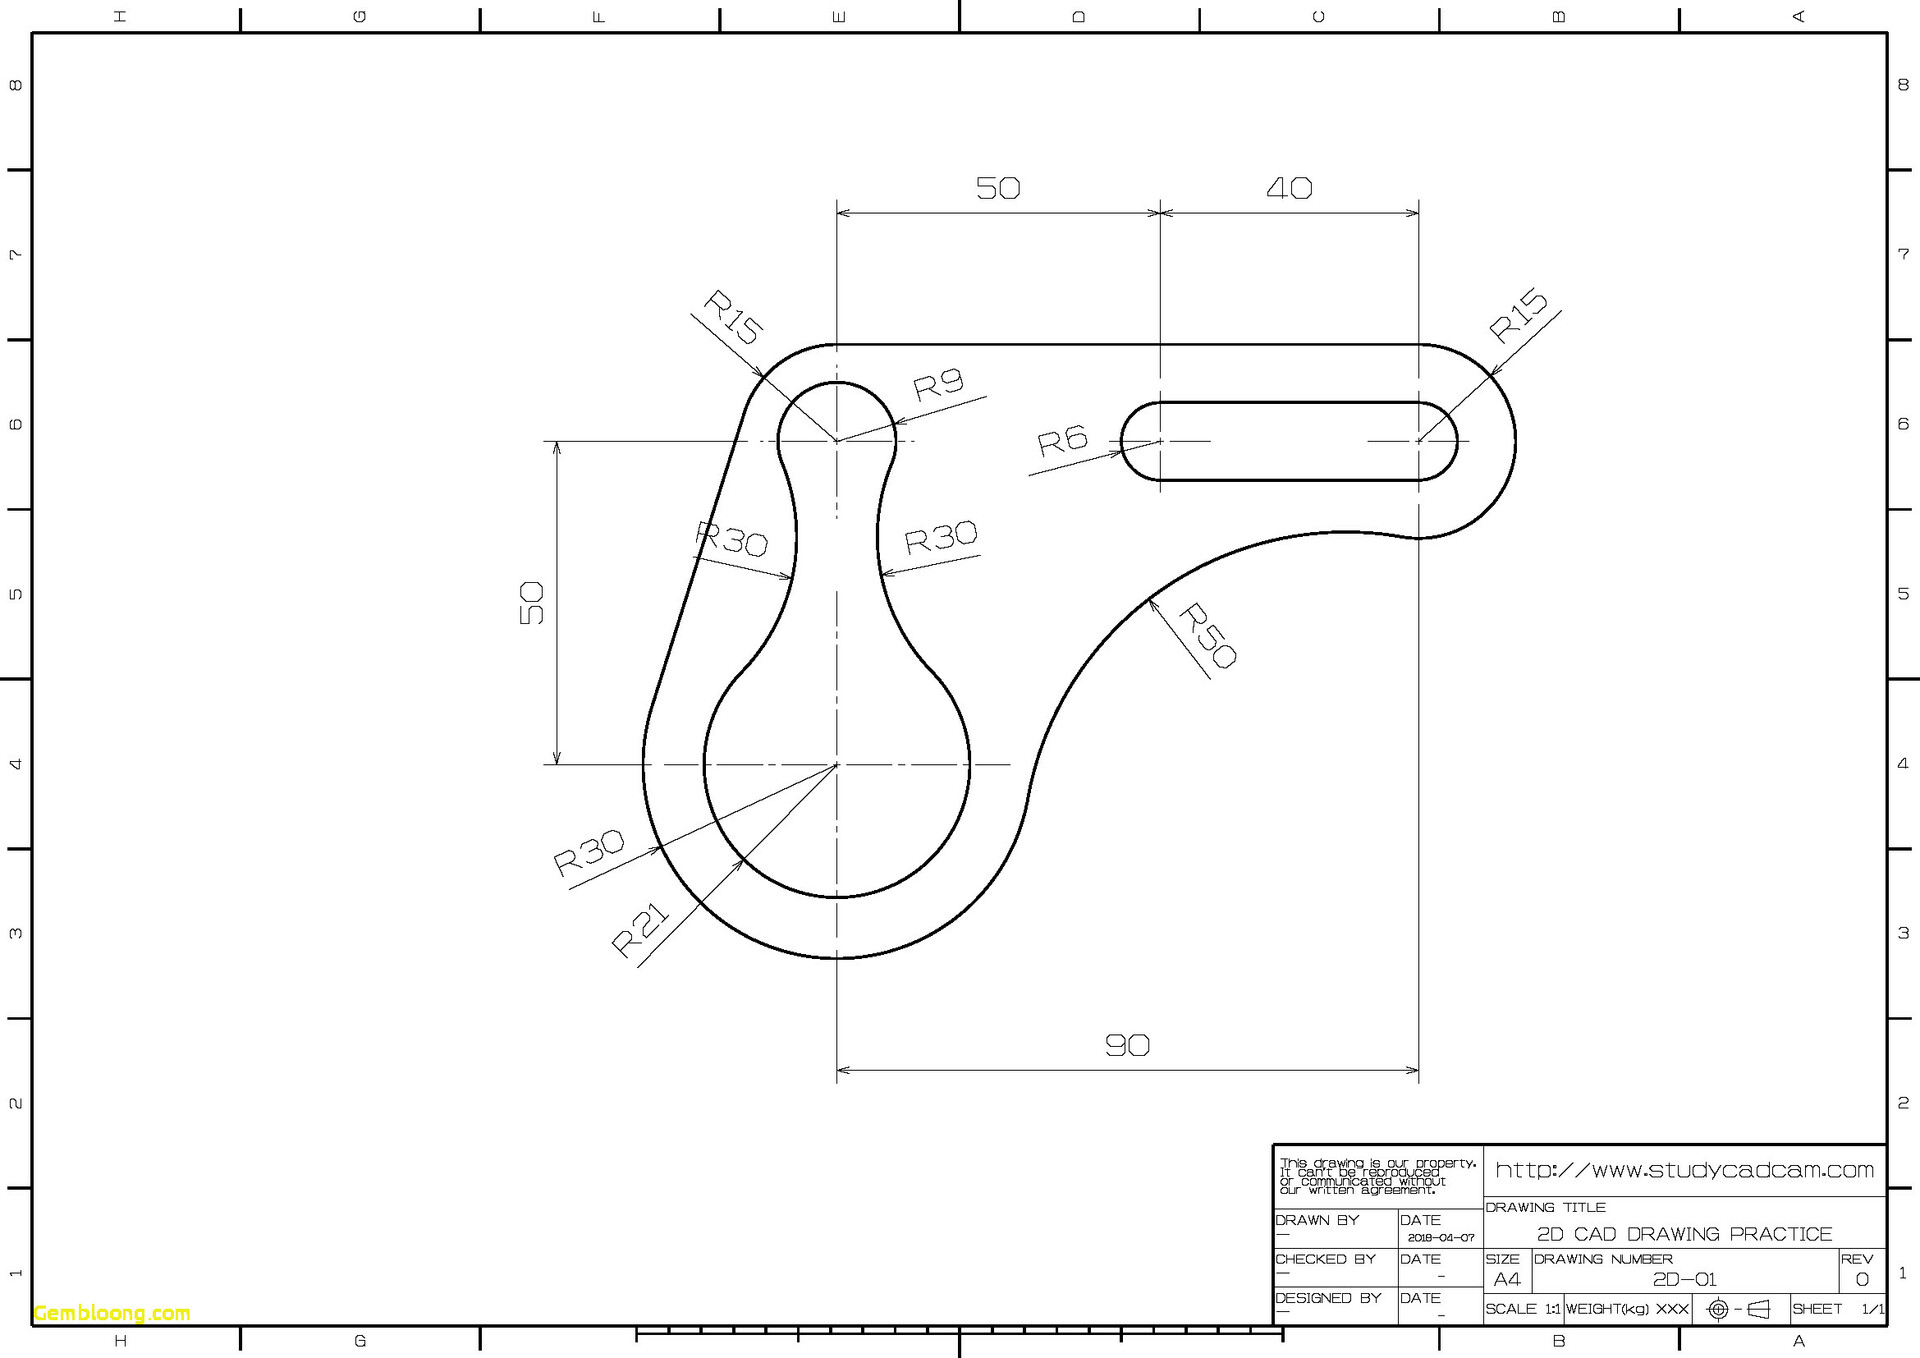
Do you ever struggle with creating 2D drawings in Autocad? Well, fear not my fellow designers, because I have some tips and tricks to help you improve your skills. But before we dive into that, let me show you a reference image that might help you in your practice.

As you can see, this is a great example of a 2D drawing in Autocad. The lines are crisp and clean, and there is a clear sense of depth and perspective.
If you want to create drawings like this, there are a few things you need to keep in mind. Firstly, make sure you have a good understanding of the Autocad interface and tools. If you're not familiar with the software, take some time to go through the tutorials and practice exercises.
Next, pay attention to the units and dimensions of your drawing. This is important if you want your drawing to be accurate and to scale. Use the command "UNITS" to set the units you want to work with. You can also use the "DIMENSION" command to create precise measurements.
Another important thing to consider is your drawing layout. Make sure you set up your drawing space with the correct dimensions and orientation. You can use the "PAGE SETUP" command to do this.
When you start drawing, use the "LINE" command to create lines. Make sure you're using the correct line weight, color, and style. You can also use the "ARC" and "CIRCLE" commands to create curves and circles.
If you're working on a complex drawing, it's a good idea to start with a sketch. This will help you plan out your drawing and make sure everything is in the right place. Once you're happy with your sketch, you can start creating your Autocad drawing.
As you work on your drawing, make sure you're saving regularly. Autocad can be a bit finicky sometimes, and you don't want to lose all your hard work if something goes wrong.
Now, let's talk about some tips and tricks that can help you take your 2D drawing skills to the next level.
Tip #1: Use Layers
One of the most useful features in Autocad is the ability to use layers. Layers allow you to organize your drawing and make it easier to work with. You can use layers to group similar elements together, like dimensions, text, or different parts of a machine. You can also use layers to control the visibility of different parts of your drawing.
To create a new layer, use the "LAYER" command. You can then assign different properties to each layer, like color, line weight, and style. When you're working on your drawing, make sure you're using the correct layer for each element.
Tip #2: Use Block References
If you're working on a drawing that includes repeated elements, like a machine with many parts, it can be time-consuming to draw each part individually. That's where block references can come in handy. A block reference is a pre-defined piece of geometry that you can insert into your drawing. You can then modify the block reference, and any changes you make will be applied to all instances of that block in the drawing.
To create a block reference, use the "BLOCK" command. You can then insert the block reference into your drawing using the "INSERT" command. Make sure you give each block reference a descriptive name so you can easily identify it later.
Tip #3: Use Hatches and Gradients
If you want to add shading or texture to your drawing, you can use the "HATCH" command. This command allows you to fill a closed area with a pattern or gradient. You can choose from a variety of pre-defined patterns, or you can create your own custom patterns.
When you're working with hatches, make sure you pay attention to the scale and orientation of the pattern. You can adjust these settings using the "HATCHEDIT" command.
Tip #4: Use Xrefs
If you're working on a large drawing with multiple sheets or views, it can be helpful to use external references (Xrefs). An Xref is a separate drawing file that you can insert into your main drawing. This allows you to keep your main drawing file smaller and more manageable.
To add an Xref to your drawing, use the "XREF" command. Make sure you set the correct insertion point and scale. You can also adjust the visibility of the Xref using the "VISRETAIN" and "VISRETAINMODE" commands.
Tip #5: Customize Your Workspace
Finally, if you're working with Autocad for extended periods of time, it can be helpful to customize your workspace to suit your needs. You can create custom toolbars, menus, and commands, and you can adjust the layout and color scheme of the user interface.
To customize your workspace, use the "CUI" command. This will bring up the Customize User Interface dialog box, where you can make all sorts of adjustments.
Now that you have these tips and tricks, you're well on your way to creating great 2D drawings in Autocad. Remember to practice regularly, and don't be afraid to experiment with different tools and techniques. Have fun!
How to Create a 2D Drawing in Autocad
If you're new to Autocad, here's a step-by-step guide to creating a basic 2D drawing:
- Open Autocad and start a new drawing.
- Set up your drawing space using the "PAGE SETUP" command.
- Choose the appropriate units using the "UNITS" command.
- Create a sketch of your drawing using a pencil and paper.
- Start creating your drawing using the "LINE" command. Make sure you're using the correct line weight, color, and style.
- If you're working on a complex drawing, consider using block references to save time.
- Use layers to organize your drawing and control the visibility of different elements.
- Add shading or texture to your drawing using the "HATCH" command.
- Save your drawing frequently to avoid losing your work.
Tips for Creating Better 2D Drawings in Autocad
Here are some more tips to help you take your 2D drawing skills to the next level:
- Use layers to organize your drawing and make it easier to work with.
- Use block references to save time when working with repeated elements.
- Add shading and texture to your drawing using the "HATCH" command.
- Use external references (Xrefs) to keep your main drawing file smaller and more manageable.
- Customize your workspace to suit your needs.
By following these tips and practicing regularly, you'll soon be creating 2D drawings in Autocad that are accurate, detailed, and visually appealing.


Post a Comment for "2d Sketch Drawing"